Monday, December 3, 2012

How Big Can I Print?

Last week I got an email from a lady who wanted to print over the shoulder of a shirt and off the edge of another.  Unfortunately we can't screen print designs like that.  We get a lot of requests like this, so I am going to write a post about it hopefully to save some heartache in the future.

First off, we can only print in a 12"x17" rectangle:
 
That restricts how big your design can be, but if you really think about it, it will cover most of the front of a shirt.  
 
Here is an example of what one of our customers was wanting:
 We can't print something like this because, first of all, our screens aren't that big. And second of all, we can't print off the edge of a shirt. 

  The below design would not fit with our screen size either.  Also notice how it goes right to the neck line.  We have to stay 2" away from the edge of any clothing item:


Another question we get a lot is, "Can I print over a zipper."  Surprisingly we can print over a zipper as long as there is a lip covering the zipper.  Here is an example we printed today:


We can also print a design wrapped around the side of a shirt.  I don't have a picture of any right now, but when one comes through, I will be sure to post it.


5 Ideas for Cool Shirts on a Tight Budget


Screen Printing can get pricey.  Over the years, however, I’ve noticed that there are a few little things you can do that will save you money.  Here are five ideas that will keep costs down:

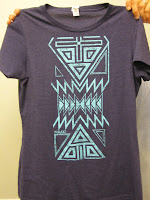
First: Just use a one color design!  If you only print on one side of the shirt, this is probably the best way to keep the cost down.  Most of my favorite shirts that we print are when customers choose a large, one color, artsy design that covers the front of the shirt.  Here’s an example:


Second: If you want to have some sort of differentiation between shirts, just change the shirt color.  It doesn’t cost extra to change the color of the shirt as long as the ink choice still works with that shirt color.  This is the main trick to separate teams, group dates for high school, or just to add variation. 

 
Third:  Another way to add differentiation is to change ink colors.  You keep the same design, but change the ink.  Although this is not free (usually costs around $5.00 each ink change), it is less expensive than changing designs.


 Fourth: We get a lot of questions about mixing and matching different items for the same print.  We can do this and we recommend it!  We can print the same design on t-shirts, hoodies, athletic shirts, cinch bags, you name it.  As long as the design you pick fits on all of the items, this is a great way to save screen charges.  

Fifth: Half Tone your design!  (See the previous post about Half Tones).  Basically it is the process of making a one color design look like a two color design by pixilating your image. 


 Now that you know some great cost effective screening tips, give us a call for pricing!
435-787-1636

Thursday, November 29, 2012

Half Toning


We have a lot of people wonder how to make a design pop.  We understand that this can be difficult, especially when you only have one color design, but there is a technique we use that adds depth and contrast even in the simplest design.  This technique is called half toning.
 
Half toning can contribute to a design in a number of ways, it can add depth, motion, or as the name implies, simply tone down a color.  Half toning is essentially a way to create the look of a two color design by only using one color of ink.  By using dots, we essentially make an image pixilated which allows us to either fade out a solid color like this Preston Hometown Auto shirt....


 Or as we see in the Tiger Swimming shirt, we can show contrast from the bright, solid orange, to the pixilated, lighter orange within the design:


Along with our graphic experts, you can create the ultimate design for whatever budget or need you have.  Half toning allows you the chance to avoid a flat, boring design and really make the image pop off the shirt. This will give your finished product that “wow” factor that we hope keeps you coming back for more!

The Screen Printing Process


            The screen printing process is very detailed and complicated.  At Badger, we like to work with our customers through the whole process to ensure you have complete satisfaction with your order. First, the customer places the order with the secretary over the phone, through email, or inside the shop. This is when the customer tells Badger which items they would like to print on and how many they would like to print. The items then get ordered and the customer can work with an artist who designs the artwork till the customer’s approval and then sets up the artwork.

            The artwork gets taken to the back to be made into a screen, which is easier said than done. This part of the process takes a few days. Each color of the design has to be made into a screen in order for the colors to be printed onto the material, such as a shirt or a hoodie. Once the shirts arrive in the shop, they get counted and stacked according to order specifics. On the due date, the shirts are taken into production. If both sides of the shirt are printed, or if there is a multiple color design, one side is printed and then it goes through the dryer. The dryer looks more like a toaster at Quiznos. After it goes through the dryer, they are stacked again and then the second side, or the second color, gets printed.

            After the shirts are all printed and dry, they get counted again and folded by size and boxed. The orders that need to ship get taken to the front. The work order gets taken to the front where the boss checks the prices. The work order then gets invoiced and we call the customers to come pick it up.

Things to Consider Before Calling us


1)     We try not to design artwork until order is placed.
            a)     To place order, we need the following information:
i)       Shirt size break down (e.g. 22S 14M 22L 14XL 2XXL.  Youth: 1YS, 4YM, 5YL)
            ii)     Color(s) of shirts 

2)     It is very helpful to have a design in mind before making an order.
            a)     Look at the top tabs on our Blog for design ideas, or just search the web.
            b)     If you can’t find anything you like, don’t stress! We have artists who can help you with that. (15 minutes of free artwork for each order)

3)     All orders take an average of a week and a half to process and complete.
             a)     We are able to do rush orders, meaning any orders needed before the normal week and a half.
i)       Rush orders require payment up front.

4)     Payment is due upon pick-up for all normal orders.